Wellness Wednesday: My Personal Wellness Journey

Wellness Wednesday: My Personal Wellness Journey

Even though I have always been an exercise junkie and athlete, I wasn’t always well. In fact, about 12 years ago, I felt pretty far from it! And, even though I seemed to have tried everything to get my life back on track, nothing -- not even medication, a regular yoga practice, running 4-5x per week -- seemed to help.  

The thing is, only about 6 short months later, I was able to make some small shifts to my daily habits that shifted EVERYTHING. Here is a little bit on my journey from barely having the energy to leave my apartment to living a healthy, happy life.

In law school, I could barely function. I remember getting to a point where I was so depressed and anxious that I couldn’t manage to leave my apartment.  I canceled plans with friends. I stopped going to class. I cried nonstop about nothing. I couldn’t think clearly or even manage to read a book.  Really, my friends and family would likely tell you: it is a miracle I got through law school!

Now, I have to admit, that part of my life felt pretty dark, dramatic, and extreme…maybe you can relate...maybe not...

BUT, in retrospect, the rest of my “symptoms” at the time seem to be common for a lot of people: my stomach constantly hurt and looked bloated. I was constipated, extremely tired, and suffered from migraines. My acne was out of control. I was anxious and stressed about just about everything.

I was diagnosed with IBS, chronic fatigue, allergies, some sort of rectal disfunction that I can't remember the name of (but, years later, my mom and I laughed about whatever it was for hours because it basically translated to "tight-ass")...I was told that my cognitive function was just lower than that of a typical graduate student and more. None of these diagnosis or the medications that were supposed to help relieves my symptoms seemed to help. Most actually made things WORSE.

In the summer of 2008, I went to my university health center to switch my birth control, yet again, in hopes that it would be the magic fix to all of my problems. 

It wasn’t (of course). But, my nurse’s suggestion that I go gluten-free was the start to a series of shifts that ultimately changed my life. After a few days sans gluten, I felt a little better. A few weeks later, feeling so much better that I was off all medications at that point, I had not only cut out gluten but also refined sugars and dairy.  

I was already practicing yoga regularly and had graduated from law school. Even though things were starting to come together (my acne was clearing up, my digestion was returning to normal, I had more energy and focus), I was constantly worried that they would return to how they had been for years. I mean, years of “symptoms” just seemed to vanish. Surely they would come back just as easily, no?

Deciding that I needed to reprogram my thinking but out of cash and untrusting of most doctors, I ended up trying what I thought at the time was the last resort: seeing a student cognitive behavioral therapist through my university health center (thankfully, I was eligible as I was still finishing graduate school at the time). Well, my parents and I had spent god knows how much money on doctors trying to figure out what was wrong with me and this $10-session student therapist who couldn't even prescribe medication ended up providing the missing pieces of my wellness puzzle!

One day my student therapist recommended I try to incorporate breathing exercises into my daily routine and whenever I started to have thoughts that weren’t serving me -- not during my yoga practice but separately, just whenever I needed them.  

This was my AHAH! moment.  I had all of these tools in my toolkit already -- YOGA, MEDITATION, MINDFULNESS PRACTICES, HEALTHY EATING, I just wasn’t using them in a mindful, consistent, and integrated way.

After about 6 months of eating mindfully, meditating daily, moving my body regularly, practicing the mindfulness exercises I had learned from my student cognitive behavioral therapist, and studying my ass off, I took the NY Bar Examination to become a lawyer. I passed on the first try, even though the pass rate was only 37% when I took the test. Me, the girl whose brain felt too foggy to read the legal text books and could barely make it to class, passed the NY Bar Examination on the first try!

I ended up becoming a lawyer, running for judge, becoming an elected judge, continuing to teaching yoga and wellness.  I married an amazing man who stood by me throughout my crazy wellness journey; we now have two amazing kids. And, somehow, most of the time, my skin is glowing, and I have the energy to juggle all of these things joyfully!

Eventually, I realized what tools and simple shifts in my daily habits were responsible for shifting my life. So, I took them and created a toolkit for myself, comprised of habits to incorporate into my busy, life in a regular manageable way and of things to keep in my back pocket in case I ever started to feel like my wellness was moving in the wrong direction again.

Over the years, I have shared these tools with others in various ways, and I am so excited to, in just a few short weeks, be able to share them through an online format through The Bodhi Blueprint! Stay tuned…



Mami Monday:  Years of Living (Almost) Dangerously

Mami Monday: Years of Living (Almost) Dangerously

I have always loved a good adventure, living right on the line between responsible and dangerous. In high school, I rode my bike through the Pyrenees Mountains from Paris to Barcelona, sleeping in a tent that I carried on the back of my bike -- no support vehicle needed (well, maybe our small group of high school students, led by two recent college grads, should have had a support vehicle...but we didn't).  In college, I traveled around Southeast Asia for a summer; I unexpectedly cut my trip short after my bus fell off of a bridge a couple of hours from the Cambodia/Thailand border, and I had to spend all of my money hitchhiking my way back to Thailand.  After college, my adventures changed for a bit, as I lost some common sense and turned toward substances; I dabbled with partying just enough to know that, if I kept it up, it wouldn't be pretty (and, the fact that my "friends" who kept it up look about twice their  age confirms that I made the right choice to return to more natural highs -- like yoga, hiking, and running).  

Through law and graduate school and my young professional career, my love for adventure didn't stop. I hitchhiked and backpacked my way through Jordan, spent a couple of months in Venezuela when most people were already trying to find their way out of the country.  A few years later, my now husband and I brought our wedding party on a strenuous hike the morning before the big day (which, by the way, was on a hiking trail in the desert on a hot day in August).

We got caught at the top of a slippery, steep mountain in a thunder storm with his middle-school-aged nephew, my sixty-three-year-old mom, my brother, my pregnant maid of honor, and the parents of three young kids. (The rest of the party was smart enough to turn around when they saw the dark clouds setting in.)

I think of all of that (and more), and I have to wonder when my life got to the point where these words came out of my mouth and made perfect sense in terms of the next big adventure to add to my story:

"Honey, we have just enough diapers left to be dangerous!"

Motherhood...

With four clean diapers left to our names and a full day of travel ahead of us, I set out to change Elias Jayne's poopy diaper.  I didn't want to risk getting feces all over the white hotel bed linens, so I brought him out onto the balcony to change him (on the balcony floor, so there was no risk of his plummeting to his death... and a much easier floor to clean).  I got the poop-filled diaper off without a mess and put it down to grab some wipes.  In that moment, Elias managed to grab the poop filled diaper and one of the precious few clean ones I had left, tossing them playfully into the air.  I watched as they hit the top of the balcony rail -- the moment of truth.  For a moment, it looked as if they might bounce back down onto the balcony floor. 

But, they didn't.  I watched as both diapers rolled right on over to the other side, beginning their five story decent; poop was flying, and Elias was giggling and grinning devilishly. Did he know what he just did!? I stood up and looked down just in time to see one of the hotel employees staring, shocked, up at me. I ducked down, grabbed Elias, and crawled back inside.

"Honey, I think it is time to go. We don't need to check out officially or anything, do we?"

Motherhood has completely shifted my perspective and priorities.  Honestly, in many ways, motherhood has probably saved me from myself.  At first I thought that motherhood was the end to my years of living (almost) dangerously.  But, now, I have no doubt that this is just the beginning.  Thank you, Elias Jayne, for allowing me be your mami (as if you had a choice)! 

Go the Distance: Power Yoga for Distance Runners

All sports take an incredible amount of mind control.  Countless athletes—the best linebackers, golfers, hockey players, sprinters, figure skaters (the list goes on)—attribute a large portion of their athletic success to their mental training.  Long distance runners are certainly not an exception. 

Retired marathon runner Joan Benoit Samuelson famously said, “running is 80% mental.”  Samuelson took home the gold medal in the marathon race in 1984, the year the women’s marathon was introduced.  Another retired long distance runner, Lynn Jennings, once said, "Mental will is a muscle that needs exercise, just like muscles of the body."  Jennings failed to qualify for the 1984 Olympics only to come back in 1992 and win the bronze medal in the 10,000 meters.  In 1999, at age 38, she ran officially in the Boston Marathon in 2:38.

Whether you have your sights on setting a new marathon world-record or simply aim to complete your first 10k, committing to a mental training program will help you reach peak performance.  Because you probably do not have much extra time in your busy schedules, I designed the following yoga routine to help you, as a distance runner, to build a stronger connection between what is going on in your body and in your mind and simultaneously increase your physical aptitude for the sport. 

Practicing this sequence regularly will not only help you to effectively train mentally, but also to increase lung capacity and flexibility in your hips, lengthen your quads and hamstrings, stabilize your ankles, and strengthen your core to help decrease lower back pain.  PR, here you come!

YOGA SEQUENCE FOR DISTANCE RUNNERS

Throughout the following sequence, it is important to breathe deeply and evenly (unless otherwise noted) in and out through your nose.  In each posture and the transition between postures, continue to focus on your breath, observe how your body feels, and notice how you react if your body feels tense or tight.  Build mental endurance by continuing to tell yourself to relax your muscles.  Make sure to move through each posture mindfully.  If you simply feel a little tight or uncomfortable, breathe through the posture and remind yourself to relax.  If moving into a posture makes you feel like you may cause injury to yourself, simply skip the posture, modify it in a way that feels good to you,  and/or spend more time in another posture.

Seated Meditation

  • Posture: First thing is first. Come to a comfortable cross-legged seated position. If you are feeling particularly tight in your hips, you can roll up a blanket or towel and place it underneath you for support. Place your hands gently on your knees. Sit up tall through your spine and soften your shoulder blades down your back.

  • Breath: Slow, even inhales and exhales for 3-5 minutes

  • Benefits: A number of studies, including ones conducted by Harvard University researchers, show that meditation, even for only a few minutes a day, reduces stress and helps you to focus. In an endurance sport where every second counts, the ability to hone in on your blind spots while continuing to push forward is invaluable.

Kundalini Goalpost Twist

  • Transition: Raise your elbows up to shoulder height and stack your hands over your elbows.

  • Posture: Keep your arms up and twist through your torso to the right and left. Continue to sit up tall. Allow your head to come over the shoulder of the direction you are twisting. Notice if it is easier to twist to one side or the other.

  • Breath: Quick exhales out through the nose every time you twist. 3-5 minutes.

  • Benefits: Increase lung capacity. Promotes body awareness; as you move through this exercises, notice if one side feels tighter than the other or if you feel “stuck” in the movement or in your breath. Builds core strength.

Ankle Roles 1.0

  • Transition: Release down onto your back and hug your knees into your chest.

  • Posture: Keeping the back of your head and shoulders down on the mat, aim to cross your forearms across your shins and grab your ankles. Roll your ankles clockwise 25 times. Repeat, rolling your ankles counterclockwise 25 times.

  • Breath: Even inhales and exhales through the nose.

  • Benefits: Neutralizes your spine. Builds strength and flexibility in your ankles.

 Lying Psoas Stretch

  • Transition: Plant your left foot on the floor. Extend your right leg toward the sky or as high as you can without compensating by bending the right leg. Extend your left leg straight along the ground.

  • Posture: Keeping the back of your head and shoulders down on the mat interlace your fingers around your right leg, anywhere that feels good for you and where you can keep your right leg straight. Simultaneously, press your left thigh down and pull your left toes back toward your left knee cap. Reach the ball of your right foot away from you.

  • Breath: Even inhales and exhales through the nose.

  • Benefits: Increases flexibility in your hamstrings. Increase range of motion. Reduce strain on lower back.

Rag Doll

  • Transition: Hug both knees back into your chest. Roll back and forth along the length of your mat until you build some momentum. Plant your feet on the mat and lift your hips to the sky, coming into a forward fold.

  • Posture: Place feet hips-width distance apart. Cross your forearms and grab opposite elbows with your hands. If you feel any tension in your hamstrings or lower back, bend your knees. Shift your weight forward into the balls of your feet to open up your hamstrings a bit more.

  • Option: Take this to a wall. Bring the backs of your legs to the wall and hold for 3-5 minutes for a DEEP stretch in your hammies.

  • Breath: 5-10 slow, even breaths.

  • Benefits: Increases flexibility in your hamstrings.

Runners Lunge

  • Transition: Bend your knees. Plant your hands on the mat. Keeping your hands at the front of the mat, walk your feet to the back of the mat. Lift your right foot and place it to the outside of your right hand.

  • Posture: Place both hands to the inside of your right foot. Stack your right knee over your right ankle. Sink your hips down toward the mat as you simultaneously send your chest forward, your left heel back, and your left quad muscles up toward the sky. Keep your neck long by looping down and slightly in front of your fingertips. Activate your core. Move to next posture, side lunge, before switching sides.

  • Breath: 5-10 slow, even breaths each side.

  • Note: If your hamstrings are feeling particularly tight, consider skipping this stretch and spending more time in “rag doll” and the “lying psoas stretch” as alternatives.

  • Benefits: Deep hamstring stretch. If done consistently, increases stride.

Side Lunge

  • Transition: From a runners lunge with the right leg forward, slowly pivot your torso and left foot to the left and sink your hips down as you lift your chest up.

  • Posture: If you are open enough, both hands to your heart; press your right elbow into your right knee to send the knee toward your right baby toe. If you need extra support, release your hands to the ground. Come back through a runners lunge and then back to a plank position before switching sides.

  • Breath: 5-10 slow, even breaths each side.

  • Benefits: Deep inner thigh and groin stretch. Also stretches the Achilles tendon, calves, and hips. Great posture to do before or after a long run.

 Lying Psoas Stretch with Ankle Rolls 2.0

  • Transition: From a plank position, release to your knees. Swing your legs out in front of you and roll down to your back. Extend your right leg toward the sky or as high as you can without compensating by bending it. This time, lengthen your left leg along your mat or, to modify, keep the left knee bent.

  • Posture: Keeping the back of your head and shoulders down on the mat interlace your fingers around your right leg. If your left leg is straight, press your left thigh and shin down into the mat. Flex your left foot, pulling your left toes up toward your face. Roll your right ankle clockwise 25 times. Repeat, rolling your ankle counterclockwise 25 times. Repeat on other leg.

  • Breath: Even inhales and exhales through the nose.

  • Benefits: Mental endurance. Open hamstrings. Increase range of motion in hips. Increase ankle strength and flexibility.

Corpse Pose

  • Transition: Hug both knees into your chest. Then extend your legs along the floor board. Flop your feet open. Lengthen your arms along the side of your body. Turn the palms of your hands up. Look straight up at the ceiling or sky and then close your eyes.

  • Posture: Do nothing. Let all of your muscular energy go. If thoughts start to come up or you find yourself fidgeting, take a deep breath out through your mouth and do your best to come back to stillness.

  • Breath: Stop controlling your breath. Set a timer for 5 minutes and let your body and mind be still for the entire time.

  • Benefits: Reduces stress and anxiety. Relaxes the body.


Mindful Monday: Matcha + Yogurt [Face Mask]

Mindful Monday: Matcha + Yogurt [Face Mask]

My skin has felt so puffy lately. Actually, if I am being honest here (which I am), my whole body has been feeling puffy lately. I guess that is what 28 weeks of pregnancy does to some women!

On top of that, I can see my “advanced maternal age” (I am 37) starting to show in the form of wrinkles on my forehead. BAH!

Desperate to reduce inflammation and reverse the aging process, I have to admit that I was tempted to buy a few miracle creams. Luckily, my conscious (and a link to an article my mother-in-law sent me, listing toxic chemicals in many of the day-to-day products we use) got the better of me, and I decided to search for a more natural solution.

I googled the following words: skincare, natural, aging, inflammation and DIY Face Masks. Up popped several articles and blog posts with various recipes, but two ingredients kept catching my eyes: Yogurt and Matcha.

Yogurt contains lactic acid and an alpha hydroxy acid (AHA). I recognized AHA as one of the ingredients in many anti-aging products and read some more. I found lots of claims that yogurt can help to make the skin look younger and smoother, maybe even reducing fine lines and wrinkles. CHECK.

Matcha is anti-bacterial, full of antioxidants, and contains high levels of epigallocatechin gallate (EGCG). EGCG may be helpful in reducing inflammation and antioxidants are known for increasing skin elasticity.

Armed with the information above, I created a quick and easy DIY face mask.

Matcha + Yogurt [Face Mask]

INGREDIENTS:

  • 1 packet of Republic of Tea single serving of Matcha

  • 1 giant spoonful of Total Fage Greek Yogurt

DIRECTIONS:

  • Stir until completely blended.

  • Paint onto face using kitchen brush or fingers

  • Leave on for 10-15 minutes

  • Wash with cold water or wash cloth that you don’t mind turning green

IMG_4352.JPG

Wallah — an easy pregnancy friendly, safe facial mask that you can make (and even eat) at home! I hope that you feel as refreshed as I do!!


Tahini Tuesday: Chocolate + Tahini [Bliss Bites]

I try to include a serving of Tahini in our meal plan at least once a week, if not more! The potential health benefits are so vast that they include everything from bone and heart health and cancer, arthritis, and anemia prevention. And, there are SO many options that I even created a day for it on my blog. So, check in for more Tahini Tuesday recipes (from hummus to salad dressings to buddha bowls).

I figured we would start with a family friendly favorite — I mean, check out the photo of Imi pulling at my leg trying to climb up to the counter and get a taste! Without further ado -

Chocolate Tahini Bliss Bites

[Gluten Free; Plant-based]

Ingredients:

  • 1 1/2 cups pitted Medjool dates (12 to 14)

  • 1/3 cup walnuts

  • 1/4 teaspoon pink Himalayan salt

  • 1/8 teaspoon ground cardamom

  • 3 tablespoons Sooms Chocolate Tahini (could substitute Tahini mixed with two teaspoons cacao)

  • Coating options: 1/4 cup unsweetened shredded coconut; 1/4 cup hempseeds

Directions:

  • Line section of counter with parchment paper.

  • Place the dates, walnuts salt, and cardamom in a food processor or blender (I love my Vitamix). Process until the dates and nuts are broken down and clump together, about 1 minute. Add the tahini and process until incorporated, about 20 seconds.

  • Using a spoon or cookie scoop, measure 1 tablespoon of the mixture. Roll between the palms of your hands to form a ball, then place on parchment paper. Repeat.

  • Place the shredded coconut and/or hemp seeds in a shallow bowl. One by one, roll the energy balls in the topping until fully coated. Return to the parchment paper. Cover and refrigerate at least 1 hour before serving.

Storage

  • Store in an airtight container in the refrigerator for up to 2 weeks of frozen for up to 3 months.


Superfood Saturday: Nut + Seed [Granola]

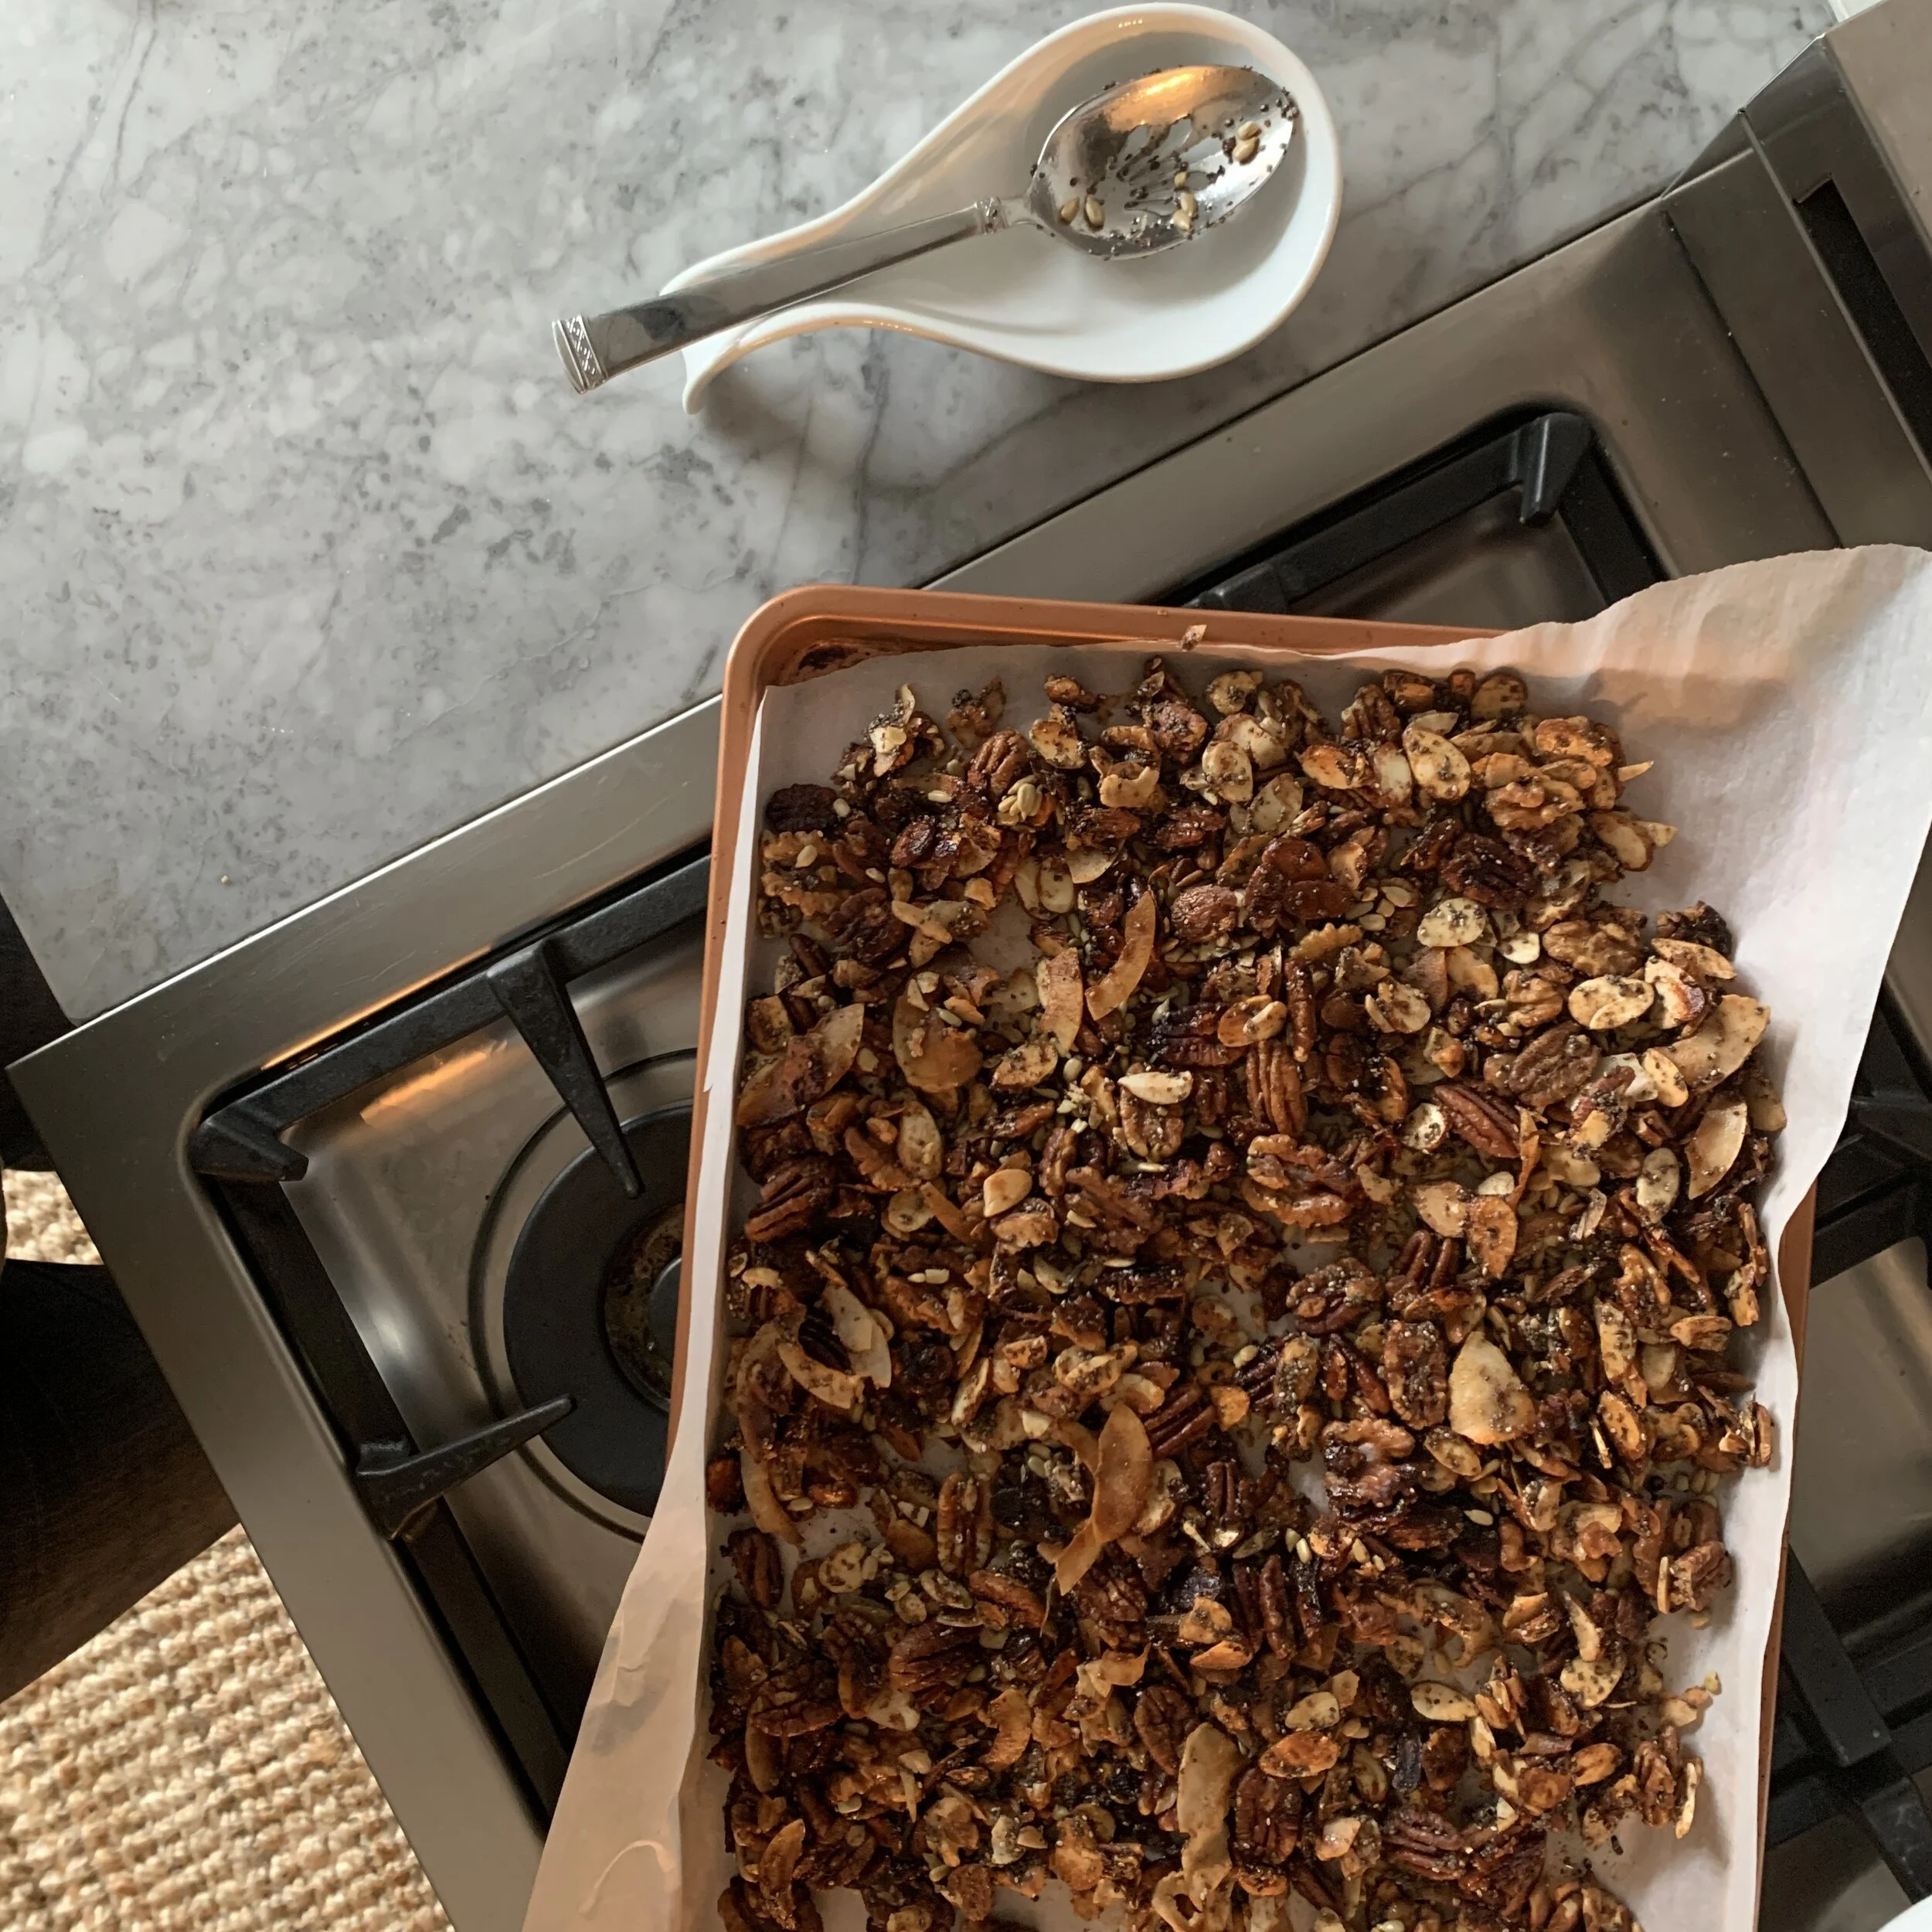
I got tired of never being able to find a good, non-processed to minimally processed gluten-free cereal or granola….so I created my own! I particularly love this granola in the fall, when paired with an anti-inflammatory turmeric latte.

Classic Gluten-free Granola

[Gluten Free; Vegan; Low Fodmap]

\

Ingredients:

  • 1 cup unsweetened shredded coconut 

  • 2 cups slivered raw almonds

  • 1 1/3 cup raw pecans

  • 1 cup raw walnuts

  • 3 Tbsp chia seeds

  • 1 tbsp flaxseed meal

  • 1 1/2 tsp ground cinnamon 

  • a pinch of cardamon and nutmeg

  • 1/4 tsp sea salt

  • 3 Tbsp coconut oil

  • 1/3 cup maple syrup 

  • 1/4 cup unsalted sunflower seeds


Directions:

  1. Preheat oven to 325 degrees F (162 C) and position a rack in the center of the oven.

  2. In a large mixing bowl, combine the coconut, nuts, chia seeds, flax seed, cinnamon, and salt.

  3. In a small saucepan over low heat, warm the coconut oil and maple syrup and pour over the dry ingredients and mix well.

  4. Spread the mixture evenly onto a large baking sheet (may require two depending on size) and bake for 15-20 minutes. Then remove from oven roasted sunflower seeds, and stir.

  5. Increase heat to 340 degrees F (171 C) and return to oven for another 5-8 minutes, or until deep golden brown.

  6. The coconut oil will help this granola crisp up nicely, but be sure to watch it carefully as it browns quickly.

  7. Once the granola is visibly browned and done cooking, remove from the oven and let cool completely.

  8. Store in a container with an air-tight seal, and it should keep for a few weeks.


Superfood Saturday: Iron-rich Molasses [Energy Balls]

Superfood Saturday: Iron-rich Molasses [Energy Balls]

*this blog post includes affiliate links.

Let me be honest. Sometimes I feel like I have something to prove, re: my decision to follow a mostly plant-based diet…as if, I am not allowed to get sick or feel low-energy because, if I do, my diet is surely to blame.

Oddly enough, when I got a call from my OBGYN letting me know that I am slightly anemic, I had been eating more non-plant-based foods that I have in ages — meat, fish, eggs, cheese…you name it…stuff that generally makes me feel BLEH but I had been craving (and decided to eat) during pregnancy!

My theory is that in filling up on these other foods, I was too stuffed to fuel my body with my usual iron-rich plant-based goodness. And so, I started to become anemic.

I decided to make a point of reintroducing and prioritizing iron-rich plant-based foods in my diet, regardless of what else I ate. My go-to assurance that I get enough? These Iron-rich energy balls (and, uh, lots of lentil soup). Almost all of the ingredients are natural and high-iron: molasses, hemp seeds, flaxseed, sunbutter, sweet potato flour….

Iron-rich [Energy Balls]

INGREDIENTS:

  • 1 1/2 cups old-fashioned gluten-free oats

  • 1/2 sweet potato flour (other options: hazelnut flour, almond flour, flax meal)

  • 1 tbs hemp seeds

  • 1 tbs flax seeds

  • 1/2 tsp cinnamon

  • dash of nutmeg + ginger

  • 3 tbs blackstrap molasses

  • 3 tbs maple syrup

  • 3/4 cup sunbutter (or whatever kind of nut or seed butter you prefer)

DIRECTIONS:

  • Combine ingredients in a bowl

  • Roll into ball shapes (makes ~16)

  • Store in air tight container in refrigerator for up to 2 weeks!

Ingredients used:

Disclaimer: you can overdose on iron; talk to doctor if they recommend supplement before eating these or other foods for medical reasons or instead of taking a supplement.

Frozen Friday: Vegan Vanilla Yogurt + Goji Berry [Bark]

Frozen Friday: Vegan Vanilla Yogurt + Goji Berry [Bark]

*this blog post includes affiliate links.

Problems: It is the final stretch of my pregnancy, and I am craving SWEETS! But, I know that sugary, processed snacks make me feel lousy. And, every time I eat anything too heavy, I feel stuffed and uncomfortable for days...yes, literally for days. On top of that it is winter…in Florida. I am craving winter flavors + colors (think hot coco, pumpkin spice, peppermint bark) but it is too hot outside to enjoy my typical go to winter snacks.

So, what is this hormonal pregnant mama to do? Make this vegan vanilla yogurt and goji berry bark. It turns out that this creation not only satisfied my pregnancy and winter cravings, but also it is an easy-to-make healthy snack that my whole family loves! How is that for a win-win?

Give it a try. It might just become your new favorite too!

Vegan Vanilla Yogurt + Goji Berry [Bark]

INGREDIENTS:

  • 1 1/2 cups vegan yogurt (I like to use the plain cashew yogurt from Forager Project)

  • 1 tsp organic vanilla powder (or you can use vanilla yogurt)

  • 1 organic banana

  • 1 tbs chopped walnuts

  • 2 tbs cacao nibs

  • 2 tbs goji berries

  • 1-2 tbs raw maple almond butter (or other nut butter of your choice. (I used Maranatha; see below)

DIRECTIONS:

  • Combine yogurt + banana in high speed blender or food processor until smooth

  • Pour mixture on parchment-lined baking sheet

  • Sprinkle walnuts, cacao nibs + goji berries on top

  • Put soft almond butter into a plastic bag and cut toff the corner. Squeeze bag to drizzle the nut butter all over yogurt. You can always add more later.

  • Freeze 2-4 hours (or until frozen)

  • Once frozen, break into smaller pieces and enjoy!

Ingredients used:

Fertility Friday:  Black Maca [Energy Balls]

Fertility Friday: Black Maca [Energy Balls]

*this blog post includes affiliate links

I must admit, I was (and still am) a little hesitant to write about this subject on my blog.  On the one hand, it seems like such a private and personal subject to me; on the other, I know that I am not the only person I know going through fertility struggles and maybe sharing my journey will help someone else who is going through similar issues.  So, here I go...

Conceiving baby #1 was easy.  Well, NOT EXACTLY EASY, BUT once we figured out when to do the deed, we only had to wait about 38 more weeks for little Elias to join us in the world.  We spent several months looking at a calendar and "trying" to conceive with no luck. Then, after some friends told us that they used fertility sticks to conceive all three of their children, we bought some:

We used the sticks on the first day we saw a little smiley face on them, and THEY WORKED!!!

So, when we decided to get serious about having baby #2, I got back on Amazon and bought the sticks again.  We were not so lucky this time.  Maybe, I thought, it is because I am a few years older now, over the hill in terms of prime baby making age.  I remembered that, at 36, I am still a few years younger than the average age of a woman who gives birth at the hospital where my son was born.  And, moreover, I was assured that I am healthy and have no fertility issues.  BUT, I do have a fertility issue...a big one:  I can't seem to get pregnant. 

So, I upped the anti and bought a fancier advanced fertility monitor (see below).  Still no luck!  I questioned whether extended nursing of baby #1 was to blame.  Research suggested that, because I ovulate and menstruate regularly, it is probably not.   

I read about secondary infertility (apparently it is a thing).  Ultimately, I decided that, before I go ahead and rip the "baba" (baby #1's name for the boob) away from the little guy or head to a specialist who might suggest pumping me with drugs, I would dig a little deeper and make a few more efforts to optimize my health.  I realized that, there are a number of changes that I needed and wanted to make to my lifestyle and health before conceiving another child anyway.

So, we hit the pause button on the attempted baby making, and I made some changes, big and small, over the past 45 days.  So far, here is what I did.  Some of these things may seem like obvious changes, others questionable.  I don't know what the answers are but figured I would document the changes, how they make me feel, and the results, if any.  

1.  I gave up my 2-4 cups of coffee a day (I know, gross) and replaced them with a morning matcha latte.  This is one of my favorite brands:

Matcha Green Tea Powder - Superior Culinary - USDA Organic From Japan -Natural Energy & Focus Booster, Antioxidant Packed. Matcha Tea For Mixing In Lattes, Smoothies & Baking 1.05oz By Matcha Wellness

2.  I cut out stevia and other refined sugars.  Some research suggests that stevia, in high doses, can act as a form of birth control. And, we all know (or should know) that refined sugars can do a number on our hormones, amongst other nasty things to our bodies and brains.  When I want a little sweet in my matcha, I opt for a drizzle of raw honey or maple syrup.

3.  I tried to replace as many chemicals as possible with natural cleaners.  I purchase a lot of my household cleaning supplies on Thrive Market (more on Thrive below) because I trust that they sell the most natural options out there, and I can usually find some good deals that save me some $$$!  

4. I carved out time for my self-care.  I have been attending at least one public yoga class a week and reincorporating daily meditation into my routine.  IT FEELS GOOD.  And, I am reminded about all of the amazing things happening in my life RIGHT now. And, more importantly, I am taking the time to enjoy them.  The result, my usual high stress levels (one of the biggest causes of infertility) are coming down. I feel better about myself, inside and out.  WIN-WIN!

5.  I started taking prenatal vitamins.  (My last OB-GYN told me to start taking them at least a few months before planning to conceive.). My favorite brand:  

SmartyPants Prenatal Complete Gummy Vitamins: Multivitamin, Folate (Methylfolate), Vitamin K2, Vitamin D3, Methyl B12, Biotin, Omega 3 DHA/EPA Fish Oil, 180 count (30 Day Supply)

5.  I carved out time for me and my partner.  As much as we just love soaking up as much time as we can with our little guy, we also love and need to spend time without him, nurturing our relationship with each other.

6.  And, finally, I researched fertility boosting foods and made an effort to include them in my diet. Each month, I place an order with Thrive Market, an easy place to purchase many of the fertility boosting foods on my list at discounted rates.  Some of my favorites are hazelnuts, maca, beans, cauliflower, bee pollen, green smoothie concoctions, and (when I am craving something sweet) dates! My favorite food fertility snack (also just a great energizing snack in general)!?

BLACK MACA [ENERGY BALLS]

INGREDIENTS 

  • 2 tsp Black Maca Powder

  • 1/2 cup Hazelnuts 

  • 1 cup Pitted Dates

  • 1/4 Cup Cacao Powder

  • 1 Tbsp Coconut Oil

  • Almond Flour, Bee Pollen to taste

DIRECTIONS

  • Optional: Soak hazelnuts in water overnight.  

  • Place al ingredients EXCEPT almond flour and bee pollen, in a high speed blender.  Blend until ingredients form a sticky paste. 

  • Roll mixture into balls; roll balls in almond flour and bee pollen (optional).

  • Refrigerate 

These energy balls are 100% family friendly in my house!  EVERYONE loves them!

Enjoy! 

My favorite brand of black maca (and the bag from which I adapted the recipe above):

Sunfood Black Maca Powder, 4oz, Raw, Organic

*Warning:  Some labels say that black maca "contains a chemical known to the state of California to cause birth defects or other reproductive harm."  Other sources say that this information is outdated and/or that black maca is known to increase potency in men and improve hormone balance and libido in both men and women.  All I can say is, do your research before you makes these snacks or make any other changes to your diet and lifestyle in order to increase fertility or induce any other results!  At the end of the day, there is definitely no one size fits all answer to any of our issues, right!?

P.S. If you feel uncomfortable, consider removing the black maca powder from the recipe and maybe replacing it with flax seeds or chocolate protein powder or almond flour.  We try not to overdo them in our house but love to snack on them from time to time -- with and without the maca!

RESULTS OF MAKING THE CHANGES LISTED IN THIS BLOG POST!? SO FAR, I FEEL GREAT.  AS FOR WHETHER THAT RESULTS IN BABY #2...TO BE CONTINUED...


Mindful Monday: Berry [Bodhi Superfood Pops]

*note, this post contains affiliate links

Fueling a family of any number can be time consuming, expensive, and tricky (to say the least) .  I must admit that I buy whole organic milk for my husband, my son, and our au pair (and try not to cringe as they drink it) and then buy my own separate non-dairy "milk" for me.  I buy one brand of gluten-free pasta for our au pair, another for my husband and son...and, occasionally, yet another for me.  R-I-D-I-C-U-L-O-U-S (I know).  So, you can imagine, when I find a healthy recipe that the whole family enjoys, I am beyond thrilled and am eager to share. 

This is one of these recipes!!!

The only problem:  I rarely get to enjoy these superfood packed, super delicious popsicles because my family manages to just about always eat them before I can get one!  Maybe it is time to invest in some more popsicle molds and double up on this recipe, huh!?  

FYI, if you don't have any popsicle molds yet, you have options.  On the super "budget" DIY side, you can freeze your "pops" in an ice cub tray and then stick popsicle sticks into them (it can get a little messy).  On the still pretty budget side, you can order molds like the ones on the right (which is what I do) and then practice the art of patience while you wait for your pops to freeze!  Or, if you are willing to spend a little more for (almost) instant gratification, you can invest in Zoku's quick pop maker (like the ones on the far right).


Berry [Bodhi Superfood Pops]

[VEGAN; GLUTEN FREE; NO ADDED SUGAR]

Ingredients

  • 2 Bananas
  • 6 ounces mixed berries (I used an organic frozen berry mix from Costco)
  • 1/2 cup raw cashews (if you have the time, soak them in warm water for at least 2 hrs and then drain...ti make them more easily digestible)  
  • 1 tbs chia seeds
  • 2 tbs of your favorite non-dairy milk (if you have the time, let the chia sit in this milk for a couple of hours before you combine both into the rest of the ingredients)

Directions

  • Peel the bananas
  • Add all of the ingredients to a high speed blender and blend until smooth
  • Spoon ingredients into popsicle mold using a funnel (otherwise it gets so so so messy)
  • Wait the required time depending on what mold you use.  (With these molds, I typically wait 6-8 hours)
  • Remove pops from mold as instructed (I run these under warm water for 30 seconds and then easily remove the pops)
  • EAT. REPEAT. ENJOY!


Mindful Monday: Almond Flour [Holiday Cookies]

These are the simplest and healthiest cookies I have made, ever.  Hands down.  And, my family LOVES them.  

Almond Flour [Holiday Cookies]

[Vegan; Gluten Free; Low Sugar]

Ingredients:

  • 2 ½ cups almond flour
  • ¼ teaspoon baking soda
  • 1 teaspoon ground cinnamon (or 3/4 cinnamon/ 1/4 nutmeg blend)
  • ½ teaspoon pink sea salt
  • ¼ cup coconut oil
  • 3 tablespoons maple syrup
  • 2 tbs coconut sugar
  • 1 1/2 teaspoon vanilla extract (or almond or coffee flavor depending on who is going to eat them)

Directions:

  • In a large bowl, combine dry ingredients.
  • Add in wet ingredients and then mix them into dry ingredients.
  • Roll out dough between 2 pieces of parchment paper until about ¼ thick
  • Refrigerate for 45 minutes
  • Remove top piece of parchment paper
  • Cut out cookies with small cookie cutters
  • Using a metal spatula, place cookies on a parchment lined baking sheet
  • Bake at 350°F until lightly browned, ~ 5 minutes.
  • If you care what they look like, let cookies cool completely before handling them. 


Meatless Monday: Cacao + Persimmon Pumpkin [Pudding]

I believe in fueling my body with whole, plant-based foods...about 85 - 90% of the time.  Check out my latest fall creation, full of superfoods said to combat heart disease, lower blood pressure, slow the aging process, and promote strong eyesight.  

Cacao + Persimmon Pumpkin [Smoothie]

[Vegan; Gluten Free]

Ingredients:

  • 1 persimmon, sliced
  • 1 banana
  • 1 can organic pumpkin puree 
  • 1 pack frozen acai
  • 10 macadamia nuts
  • 1 tsp cacao
  • 3 drops vanilla stevia
  • 1/4 tsp vanilla extract

Directions:

  • Blend in Vitamix or high speed blender to desired consistency.  
  • Pour into dish
  • Garnish with cinnamon and/or cacao
  • Refrigerate or eat immediately


Superfood Saturday: Ginger Apple Kale [Smoothie]

Long story short:  this superfood smoothie has a special place in my heart.  The recipe was literally handed down to me...on a loose piece of notebook paper...from my mom...who got it from one of the least healthy people I have ever known...my dad.

[RIP, MAJ.  I wish you drank more of these.  You might have had a fighting chance.]

Ginger Apple Kale Smoothie

[Vegan; Gluten Free]

Ingredients:

  • 1 cup organic apple cider
  • 2 generous handfuls of kale
  • 1/2 lemon, juiced
  • 1/4 cup chia seeds
  • 1/4 inch ginger
  • 1 small apple, cored
  • 1 cup ice (optional)

Directions:

  • Blend in Vitamix or high speed blender to desired consistency.  
  • Pour into a glass.
  • DRINK UP!


Pictured with two of my favorite things:  The Ginger People candies and dried lavender

Pictured with two of my favorite things:  The Ginger People candies and dried lavender

Superfood Saturday: Rhubarb [Crisp]

I remember growing up in upstate NY and just waiting for the time of year when my mom and grandmother would make their delicious rhubarb pies.   Years later, when I realized that gluten, dairy, and sugar made my body go a bit cray cray, I figured it was best to retire by rhubarb pie habit.   

But, recently, when I came across an article talking about the many health benefits of rhubarb, I decided to give the old rhubarb pie recipe a facelift.  Enter my vegan Rhubarb Crisp, high in fiber (easing digestion) and vitamin K (helping to protect against osteoporosis and Alzheimer's), and super duper tasty too!

Rhubarb Crisp

[Vegan; Gluten Free]

Ingredients:

  • 3 cups rhubarb mixed (if using frozen, place in colander and briefly rinse under cold water)
  • 1 1/2 cups raspberries or strawberries (or a mix) ((if using frozen, place in colander and briefly rinse under cold water)
  • 2-3 tbsp maple syrup 
  • 1/4 cup packed light brown sugar
  • pinch sea salt
  • 1 cup gluten-free rolled oats
  • 1/2 cup raw walnuts, chopped
  • 1/2 cub favorite gluten free granola mix
  • 4 tbsp cold vegan butter
  • Coconut cream topping (optional) (one 4 oz can coconut cream, mixed with a tsp coconut sugar, 1/4 tsp vanilla, scoop of chia seeds; mixed and refrigerated for at least 1 hr)

Directions:

  • Preheat oven to 350 degrees F and lightly (vegan) butter an 8X8.
  • Add fruit directly to the dish and toss with sugar and maple syrup.
  • Add oats, nuts, granola, and vegan butter to a mixing bowl and mix until all of the butter is evenly distributed. Distribute evenly over fruit.
  • Bake for 45-55 minutes or until the top is golden brown.
  • Let cool for 10 minutes and serve with coconut cream or your favorite vegan ice cream. 


Superfood Saturday: Pumpkin [Soup]

For years, I thought of pumpkins as only having two purposes:  (1) to hold my halloween candy, and (2) to fill the gluten-free pumpkin pie that my mom was going to make me during the holiday season.  Neither of these purposes shouted "HEALTHY," so I had a hard time wrapping my head around the fact that pumpkin is good for us...REALLY, good for us, in fact.  

So, what makes this superfood so super?  Pumpkin is low in calories, high in fiber, and loaded with nutrients--beta carotene and potassium to name a couple -  that will keep your heart, bones, eyes, and skin healthy!  

Now that fall is here (well, at least maybe for those of you who aren't living, like me, in Florida), try one of my two soup recipes, either Straight Up Pumpkin Soup or the tangier variation, Spicy Ginger, Squash, and Pumpkin Soup.

STRAIGHT UP PUMPKIN SOUP

[Gluten Free; Vegan; Low Fodmap]

Ingredients:

2 cups vegetable stock
15 oz pumpkin puree
1 tsp olive oil
2 cloves garlic, minced (omit if fructose intolerant/need low fodmap option)
1 shallot, minced
1 tsp freshly grated ginger
1 tsp chili powder
1/2 tsp cumin

squeeze of citrus

pinch of maple syrup
salt + pepper to taste

Directions:

Saute garlic, shallot, and grated ginger in the olive oil for a few minutes. Add stock, pumpkin puree, and the remainder of the ingredients. Simmer for 15-20 minutes. You can use an immersion blender to puree the soup or toss it in the blender. If you are in a hurry, just eat it!

SPICY GINGER, SQUASH + PUMPKIN SOUP 

[Gluten Free; Vegan; Low Fodmap]

Ingredients:

1 cup canned organic pumpkin
4 cups butternut squash cubes
1 Tbsp ginger powder
1/3 cup grade B maple syrup
3 Tbsp vegan buttery spread
1/2 tsp pink sea salt
1/4 tsp cinnamon

1/4 tsp cayenne
4-5 leaves fresh sage, torn
2/3 cup plain coconut  milk 

Directions:


1. Add 4 cups of water to a large pot. Bring to boil. Add in butternut squash cubes and a pinch of salt. Boil until squash is tender.

2. Drain the squash and add to a Vitamix or high speed blender. Add in  all of the remaining ingredients.  Blend on high. Garnish with fresh sage leaves.  Serve immediately or freeze!

Meatless Monday: Red Quinoa + Apple Salad [Lunch or Dinner]

After my recent trip to San Diego ComicCon, I was feeling a little under the weather.  Go figure, that is what sleepless nights, air conditioned rooms, gelato and a bacon cheeseburger (on a gluten-free bun, of course) would do to me.  Packed with fiber and protein, this superfood salad turned my frown upsidedown and inspired me to go meatless on Mondays and re-cut out the dairy for a bit too.  BALANCE! 

Red Quinoa + Apple Salad

[Gluten Free; Vegan]

Ingredients:

  • 1 1/2 cups red quinoa, cooked per package directions
  • 2 apples, cored and chopped
  • 1/4 cup unsweetened raisins and cranberries or a combo of both
  • 3 stalks celery, finely chopped
  • 1/2 cup chopped walnuts
  • To taste:  Olive Oil, Balsamic Vinegar, Pink Sea Salt, Pepper 

Directions:

  • Put all of the ingredients in a large bowl and mix them up (so not like in this photo).  Refrigerate until time to serve.